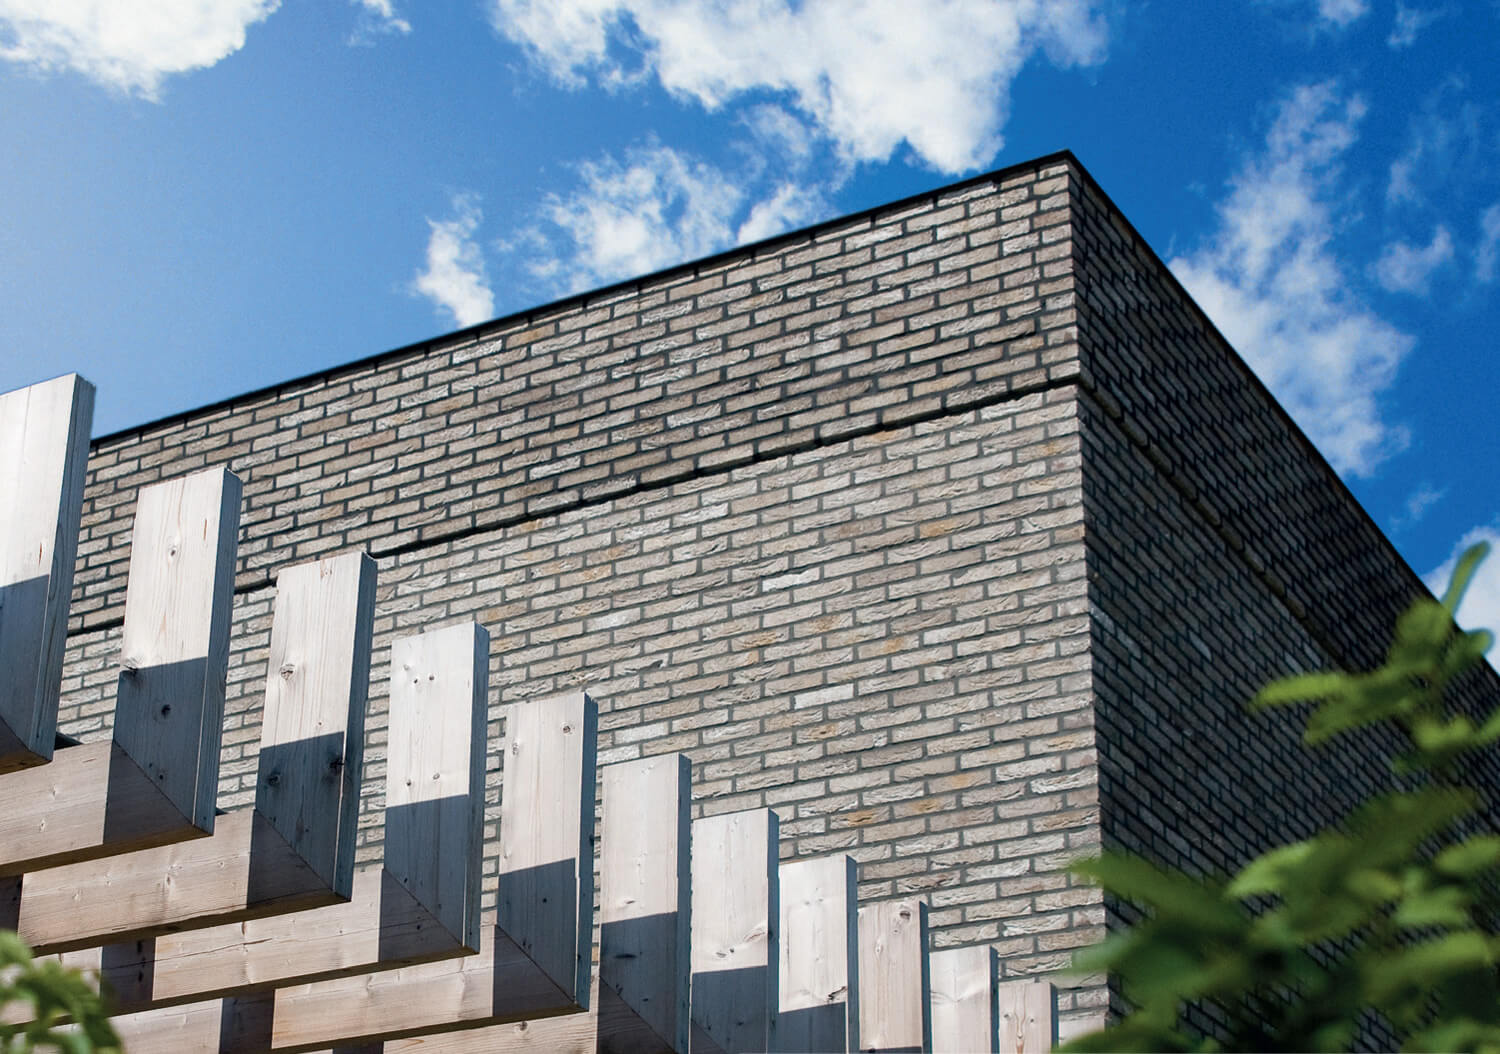
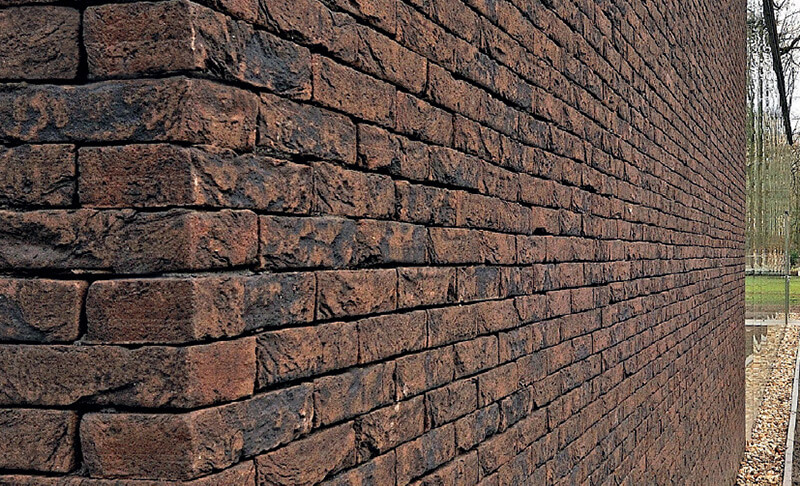
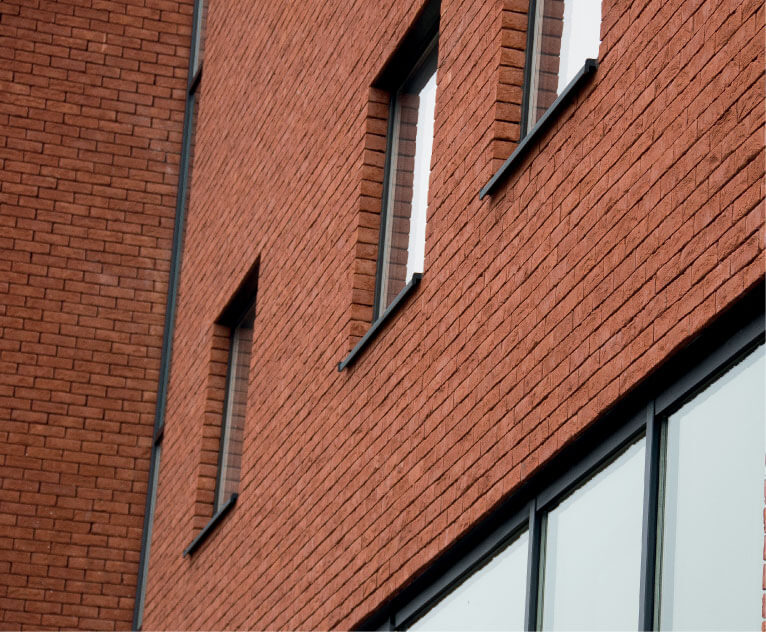
House BVA / dmvA
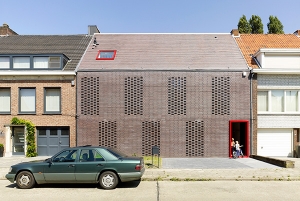
House BVA / dmvA
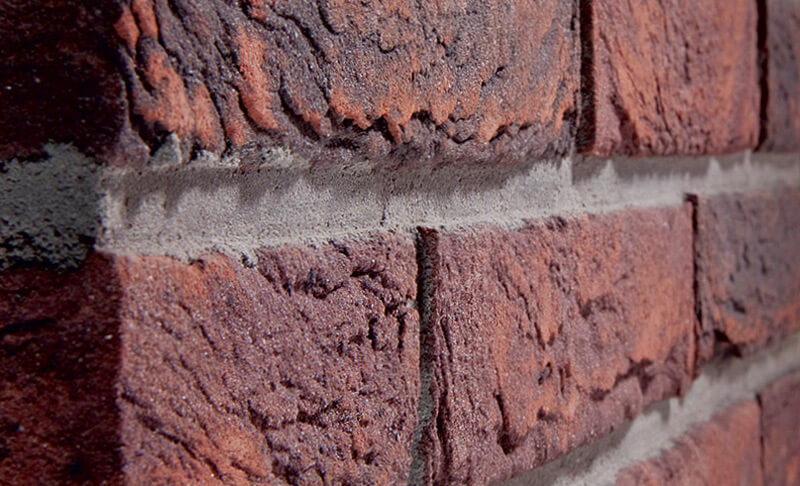
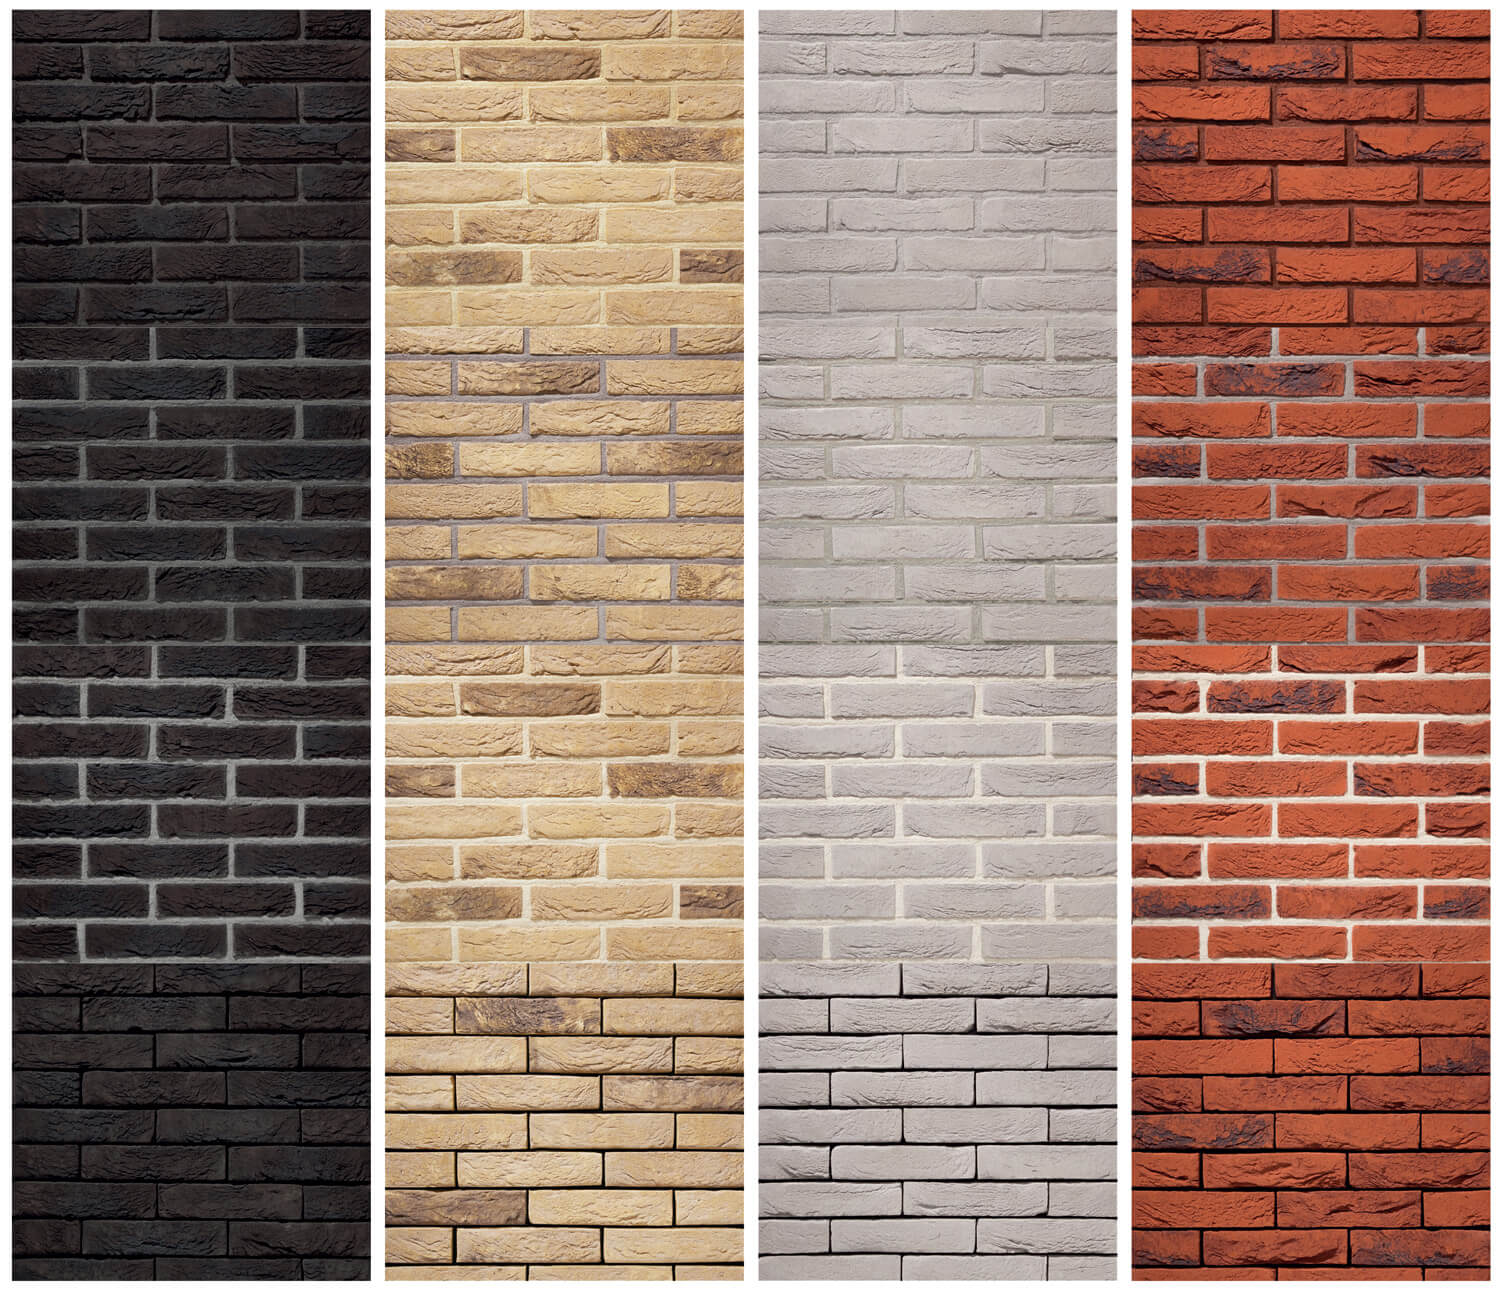
Why brick?

Being made from clay and shale
brick is most abundant and natural material on earth.
Bricks have been used for building innumerable structures over many thousands of years because of their durability. The reason why the brick turns into such a durable material is that, when fired through a kiln at up to 2000 degress, clay unit goes through a vitrification process which fuses the clay particles together. Unlike other materials, brick is very user and maintenance friendly creating energy efficient buildings, but also performing various functions.
The advantages of bricks are countless...
• resistant against high pressure and frost;
• is a non-combustible material;
• does not shrink and expand during fluctuation of temperature;
• can absorb heat very well;
• is reusable and recyclable;
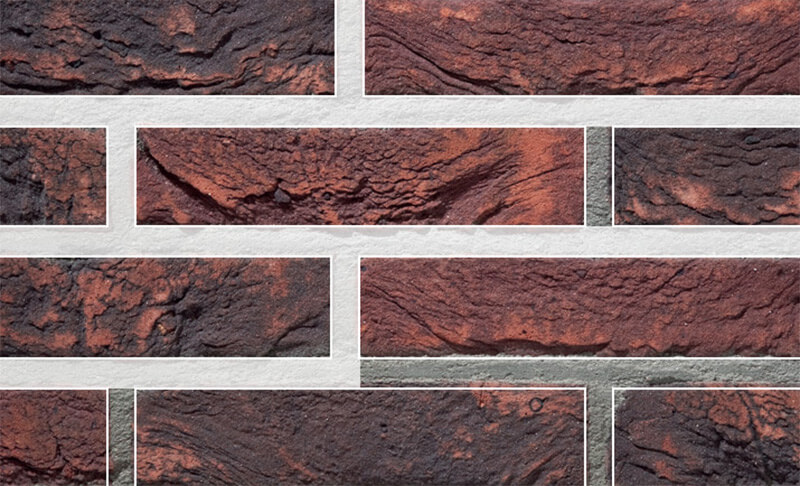
• is available in many colours and textures.
No wonder that for centuries architects and customers have a heart for bricks. Bricks do not only resist the ravages of time but also are continuously being reinvented.
10 reasons why bricks
1. The use of natural base materials
Bricks are the result of a combination of purely natural elements: clay, sand, water, air, and fire. No toxic substances are added to bricks. In addition, bricks are inert material: it does not or hardly react to other substances and also does not release toxic substances or allergens. Therefore, there is absolutely no risk of soil pollution.
2. Economical base material policy
Clay and loam are natural and seemingly inexhaustible base materials. Excavation is limited and excavated sites reconstructed for agriculture or recreation. Starting materials are used that are released during infrastructure work and building projects in order to keep down the exploitation rate of the pits.
3. Clay extraction creates new possibilities
The excavation of clay is temporary by nature. The exploitation covers a limited surface that never grows in time, but merely moves. After extraction the site is reconstructed. This often leads to added value for the biodiversity, among other things, as a result of constructing nature reserves.
4. Environmentally friendly manufacturing processes.
The production process of bricks is continuously being optimised to respect the environment . For decades, manufacturers have been taking numerous measures to decrease energy consumption:
• High-performance tunnel ovens that work on natural gas
• Strict observance of the baking process by means of computer programs
• Recycling heat from the oven in the drying rooms
• Own production of electricity by means of total energy plants
In every step of the production process people continuously search for a level of energy consumption that is as low as possible. The reason that the production of bricks has such a low and specific energy consumption is due to the fact that only the preparation, drying, and backing of the clay needs to be calculated. There is absolutely no environmental impact as a result of water contamination or residual waste.
5. Short transport distances
Brick kilns are often located near the quarry. This way the clay does not need to be transported across long distances. Some brick kilns sometimes add clay from other quarries in order to expand their product assortment. But even then, transport remains rather limited.
6. Long lifespan without maintenance
Bricks are made to last for generations. The average lifespan of a building made from bricks is estimated at more than 100 years. The impact of the building on the environment is also much smaller because it does not need maintenance.
7. Durable and precious
Their lifespan and limited environmental impact make bricks unbeatable if you want to build a durable building. Bricks make it possible to create beautiful buildings with limited spending and a long lifespan. Brick offers lasting value. It does not rot, dent, or need to be painted. Unlike other materials, bricks actually look better with age.
8. Comfortable and sturdy
The superior thermal mass qualities of brick have been known for centuries. Bricks keep out the weather and the wind due to their good heat absorption. What’s the secret? In winter, bricks store the heat on sunny days and then slowly release it. During the summer they buffer the heat and the brick building stays cool on the hottest days. In addition, bricks are non-flammable and solid as well as absorb noise which is an acoustic advantage over other materials.
9. Good recycling possibilities
Brick walls can be dismantled. Bricks are reusable after removing mortal residues, for example, for restoration or for the construction of new houses and projects. Also brick rubble from demolition sites can be recycled and reused. For example as:
• Filling and stabilising material for infrastructure work
• Ingredients for poured concrete and prefabricated mortar on site
• Ingredients for bricks from calcium silicate
• Red ‘grounded bricks’ (clay) on tennis courts
• Plant substrates
10. Flexibility of brick buildings
Buildings made from bricks are extremely flexible.
They can be adjusted during the entire building process and during the entire lifespan of the building. Hardly ever does a building need to be taken down because the bricks cause a problem.
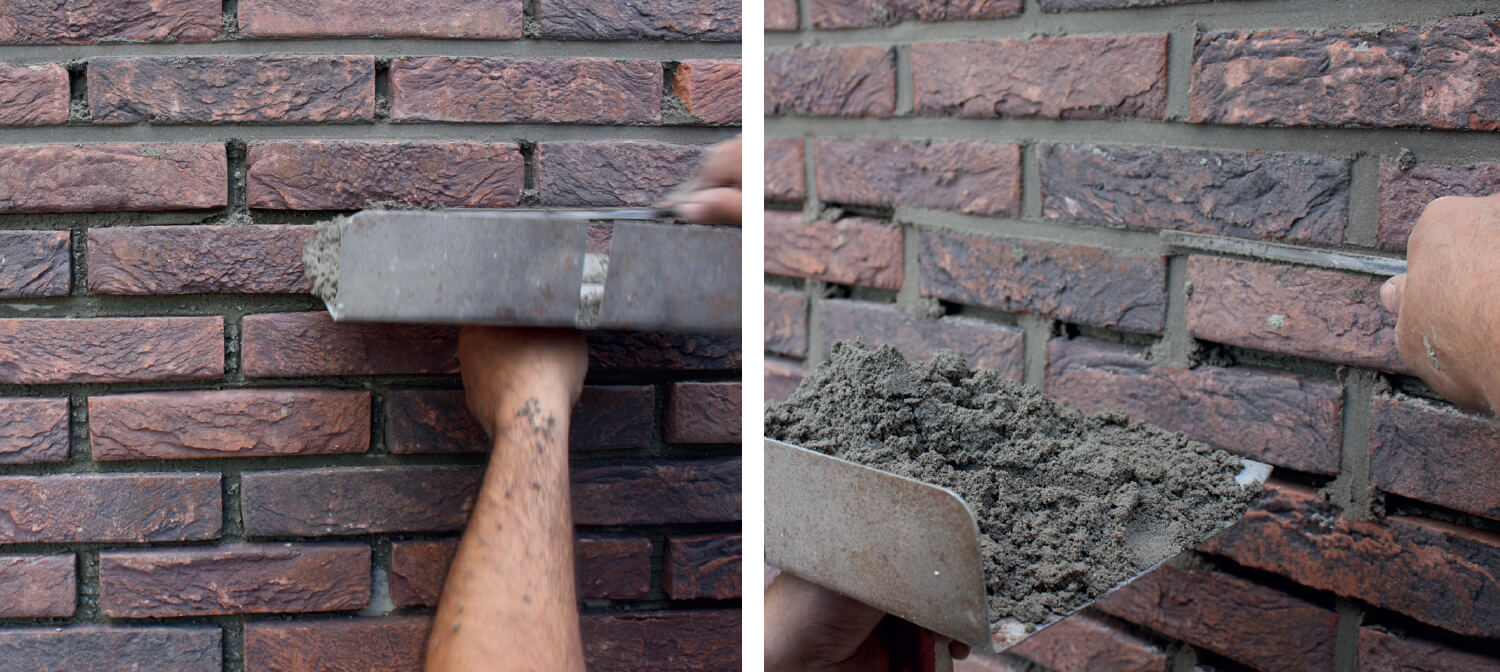
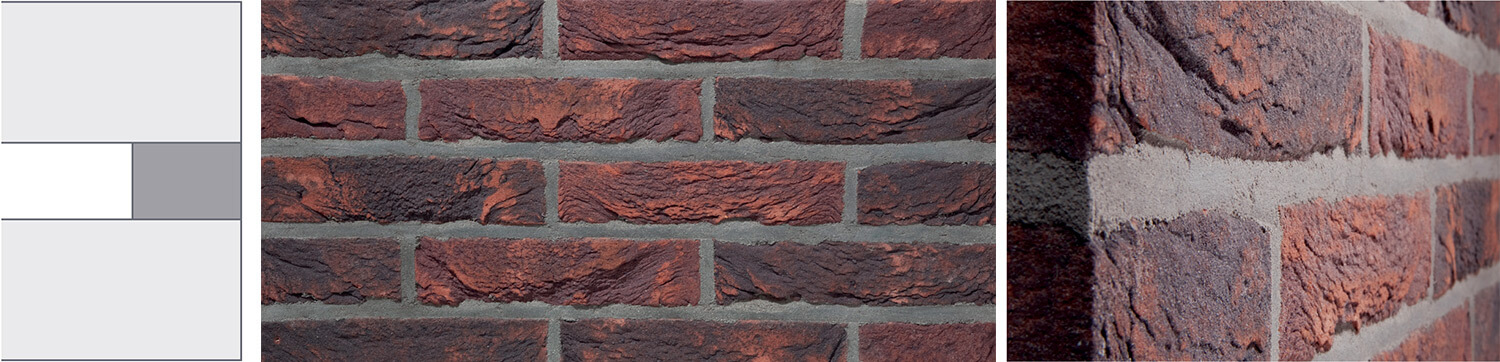
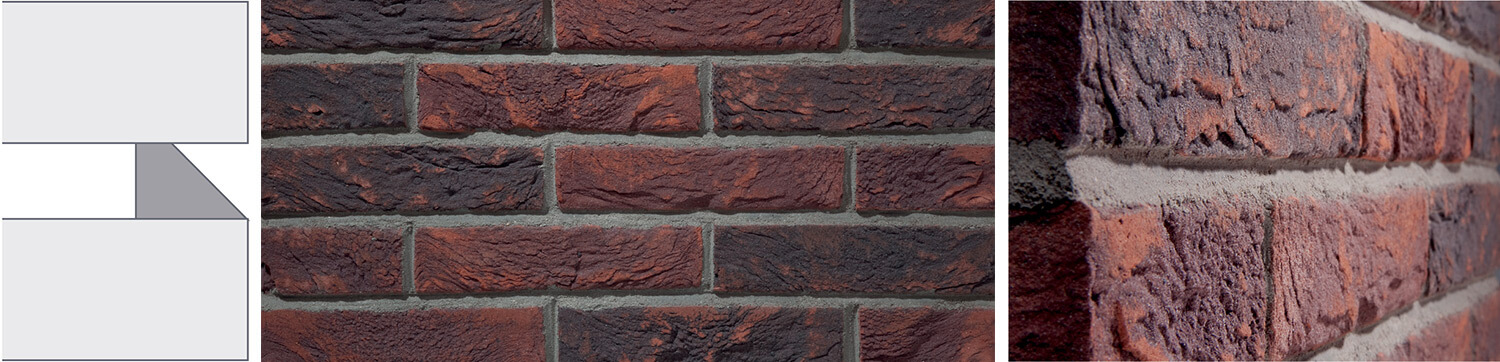
What is a joint?

Masonry mortar is used in classic masonry. Open joints of about 10 to 15 mm wide are formed between the bricks. At the end of the working day about 15 to 20 mm of this masonry mortar is scraped out, which creates the necessary space for filling up the facade with a joint mortar.
A joint mortar has 2 important purposes:
- A practical purpose: the open joints are filled correctly and efficiently.
- An aesthetical purpose: 10 to 20% of the visible wall surface consists of the joints and therefore the joints greatly influence the appearance of the finished facade.
A joint mortar mainly consists of cement, sand, and water. The composition of the joint mortar varies depending on the colour of the joint mortar. Sometimes lime and mineral colouring agents are added.
Joint techniques
The actual jointing can vary depending on the region and the building culture. There is no golden rule.
- Difference in timing
In Belgium, usually the rough structure is finished first while jointing is done in a later phase. In the Netherlands, jointing is done from the bottom upwards so that laying bricks and jointing are practically done simultaneously. Every system has its advantages and disadvantages with regard to planning, moisture effect, consistency of the joint colour, speed, scaffolds, etc. - Difference in material
You can use a jointer for jointing. A long jointer is used for the horizontal joints and a shorter jointer for the header joints. Jointing can also be done using the spraying technique.
Some tips for a beautiful and high-quality result.
- Always use clean water for making the joint mortar.
- In case of warm and dry weather conditions make sure that the fresh jointing does not dry up to fast. Bad bonding between the facing brick and the joint mortar can cause the joint mortar to fall out or pulverise in time. Avoid this by misting the facade with clean water during the first few nights after jointing. This way the joint mortar can stiffen naturally.
- According to the Belgian standard we advise you to create a joint of which the depth isn’t smaller than the height, with a minimum of 10mm.
Joint colours
When you choose to carry out a classic masonry instead of gluing the bricks, then the joint very much determines the end result.
Depending on the brick size that is used, 10 to 20% of the facade can consist of joints. Determining the colour of the joint is a choice that may take up quite some time. After all, the joint makes or breaks the facade.
An overview of the most used
joint colours and their effect
on the facade.

Grey is the most common joint colour. It is the most neutral colour. From close up there is sufficient contrast with the colour of the brick. From further away the wall and joint seem to be one whole.
Black joints are being increasingly more used. They give a warmer effect with certain brick colours.

A white joint emphasises the play with lines of the joint and simultaneously refreshes and intensifies the colour of the brick.

Colouring on colouring joints create even surfaces. The contrast between the brick and the joint is reduced to a minimum.
Tip
Always try various samples on a facade before using it for the entire project. The surrounding, architecture, and personal taste can very much influence your choice.
If the joint mortar is made at the construction site, make sure that it is always done in the exact same manner. A difference in the colour of the joint can totally disrupt the appearance of the facade. It may even give the impression that different coloured facing bricks are used.
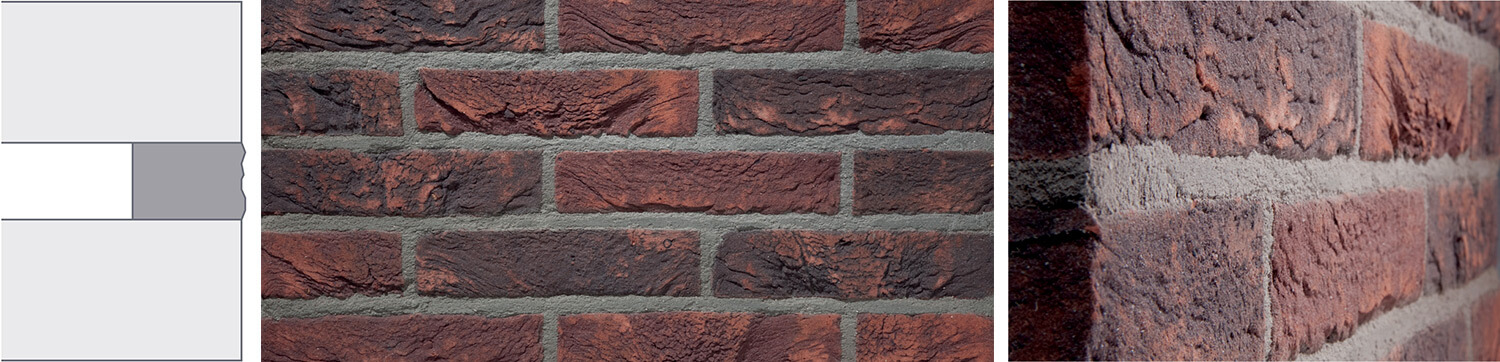
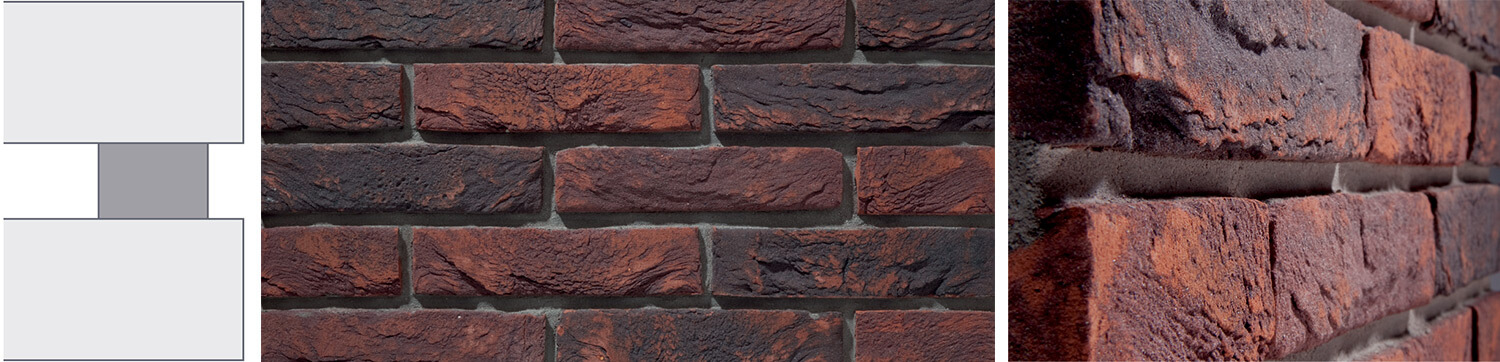
Types of joints

The form of the joint also influences the appearance of a facade. Of course the height of the joint plays an important role, but the depth is also important. The deeper the joint, the more it will end up in the background. This creates a shadow play between the joint and the facing brick,which especially emphasises the colour of the brick. There are various standard types of joints. The price depends of course on the labour intensiveness.
Flush joint
Working method
The mortar is generously applied and levelled in a smooth way so that the mortar is flush to the brickwork.
Effect
This form of pointing is often used with colouring on colouring joint mortars. The even surface that is desired is emphasised this way.
Flush brushed joint
Working method
The mortar is generously applied but not levelled smoothly. Brushing the excess mortar creates a more rough joint with more texture.
Effect
Here also this type of pointing creates an even surface when using colouring on colouring mortar. In addition, the brushed effect creates facade with more character.
Weather struck joint
Working method
The mortar is applied partially recessed in an angle of 45°.
Effect
This creates a shadow effect. The horizontal lines of the facade are emphasised.
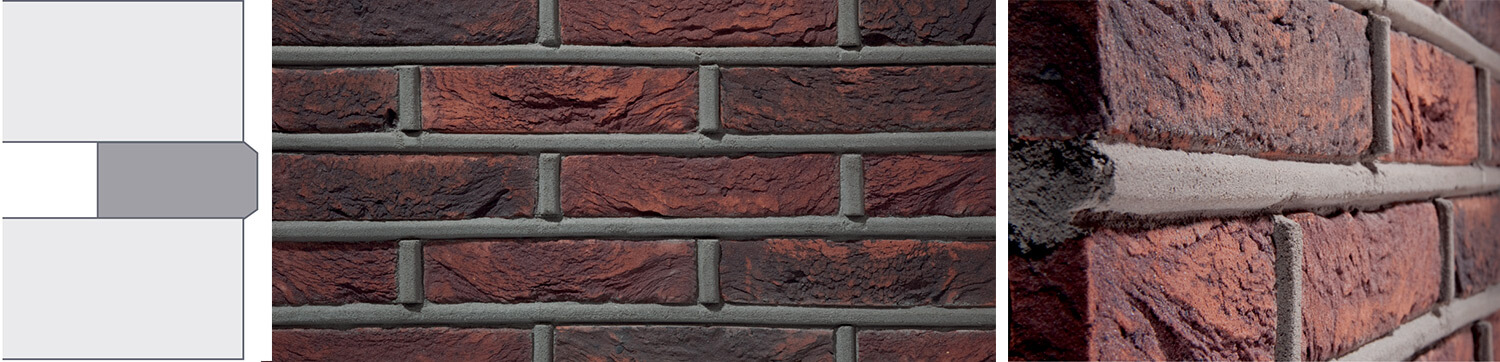
Recessed joint
Working method
This is an extra raked joint. The mortar is applied 2 to 5 mm deeper than the visible surface of the facade.
Effect
The emphasis is laid on the horizontal aspect of the facade, especially in combination with full vertical head joints or even no vertical head joints at all.
Raked joint

This is also a very common type of pointing.
Working method
The mortar is pressed a bit inwards so that it is approximately 2 mm recessed compared to the facing brick.
Effect
This creates more shadow between the joint and the brick and gives a very well-cared-for appearance. Can be done smooth or brushed.
Convex joint
This is a type of joint that is less common because it requires more time and expertise.
Working method
The mortar is generously applied but not levelled smoothly. Brushing the excess mortar creates a more rough joint with more texture.
Effect
Here also this type of pointing creates an even surface when using colouring on colouring mortar. In addition, the brushed effect creates facade with more character.
No joints
When you choose the purely brick effect the joint is a disrupting factor. Increasingly more contractors choose to create a facade without joints.
There are 3 known methods for creating a masonry without joints:
1. Bricklaying with thin set mortar
2. Gluing together
3. Traditional masonry with ZERO®
Each method generates additional costs compared to classic masonry. More facing bricks are needed per square meter of masonry. And in all cases more care and expertise is expected from the contractor. However, you do get rid of the costs of jointing.
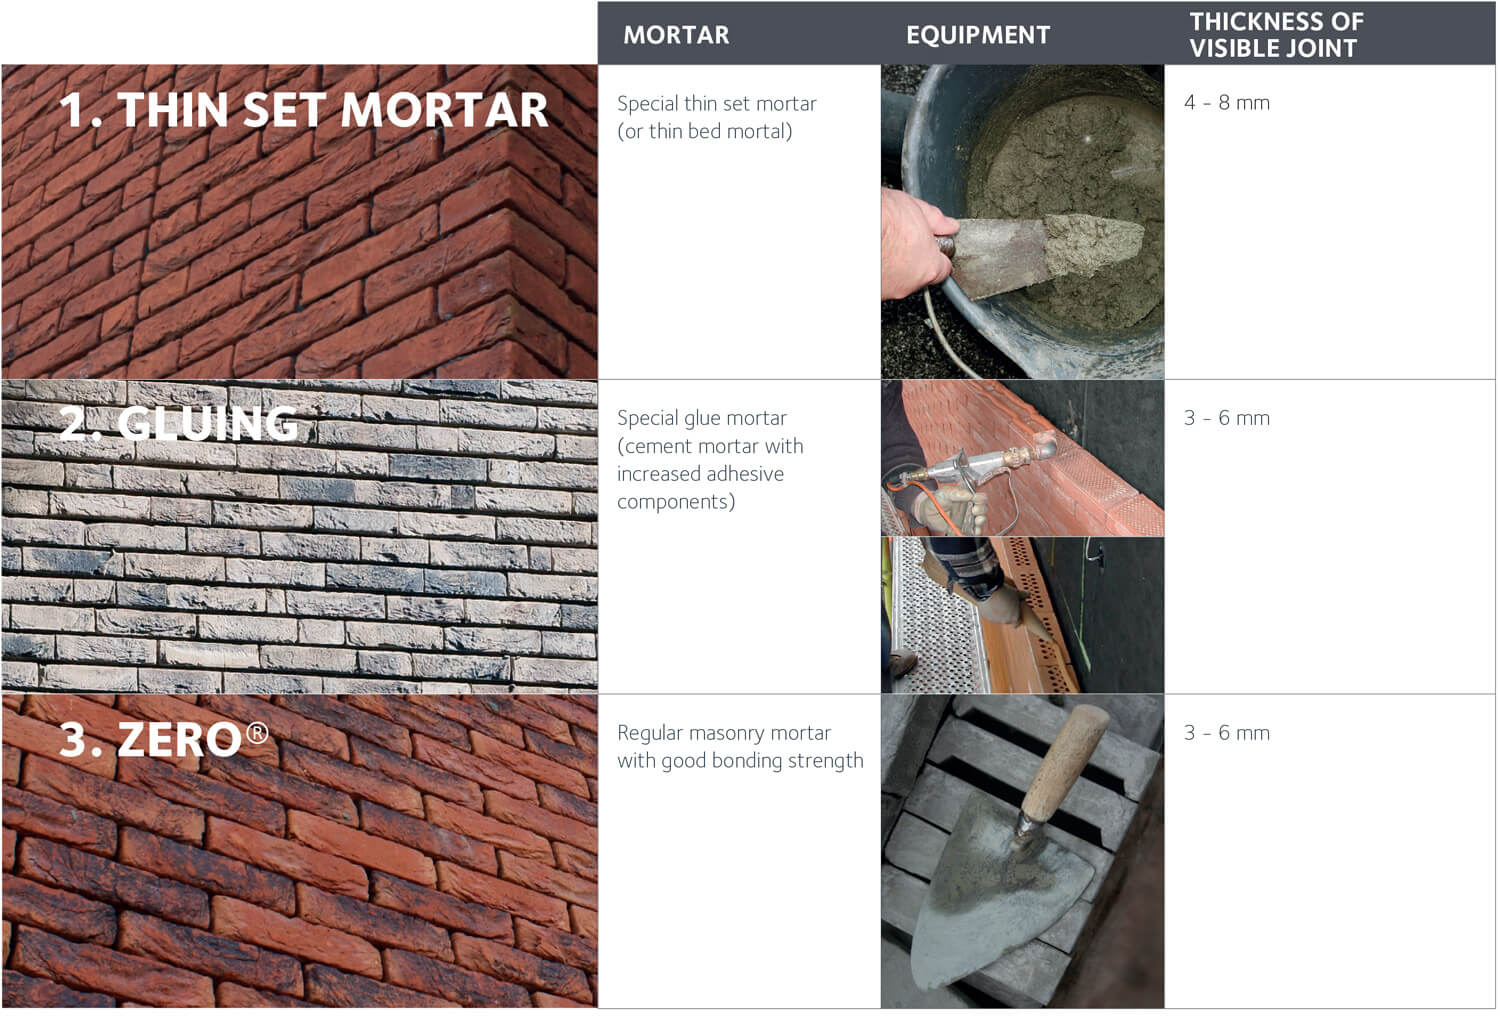
1. BRICKLAYING WITH THIN SET MORTAR
Thin set mortar, a.k.a. thin bed mortar, is a cement mortar to which glue has been added. This increases the adhesive power of the mortar, which is why the thickness of the joint can be reduced to 4 - 8 mm. The mortar is applied in a raked manner and is not jointed.
Advantage
This technique is interesting to use with facing bricks with an irregular design. After all, the mason has enough play to take care of the irregular shapes. The advantage of thin set mortar is that it is not much more expensive than regular cement mortar and that it can be handled with a trowel.
Disadvantage
The disadvantage is mostly aesthetic. Though the joint thickness is reduced, it is nevertheless present. Especially when the joint thickness leans towards 8 mm, is seems sometimes that there is a need for jointing.
2. GLUING
Here a glue mortar is used. The term is somewhat misleading, because this does concern a cement mortar. More lime is added to this mortar, which increases the strength of the mortar considerably. The joint thickness is therefore only 3 to 6 mm, depending on the dimensional stability of the facing brick. Applying the glue mortar with the classic trowel is not self-evident. It sticks too much for this.
The contractor can choose between 2 working methods:
1. With a gluing machine

The glue is applied to the bricks in the form of a sausage by means of a pump and a pistol. A second person lays the next course of bricks, etc. In good conditions this is a very proper and efficient way of working. In case of long breaks (rain, other assignments, etc.) it is necessary to refine the left over mortar in the mixer and to fill the mixer with water. In case of changeable weather this is not always fun and much time is lost. In order to work comfortably you also need more space: the gluing machine takes up a lot of space. This method is often used for bigger projects or when gluing interior blocks.
2. With a spraying sack
Like when applying whipped cream to a cake, with this method the glue mortar is poured into a spraying sack. The glue is then applied to the course of bricks in the form of a sausage. The dosing is adjusted to the desired joint thickness by adjusting the nozzle. The bricks are pressed in the glue. This method requires a bit more arm strength, but saves on the renting costs of a gluing machine. This can be a determining factor in small or medium-sized projects.
Advantage
A glue mortar is more expensive than a thin set mortar, but creates thinner joints. This method really is masonry without joints.
Because the mortar is stronger there are more construction possibilities: for example larger facade openings or spans. This is because the weaker link of facade masonry, the cement mortar, is replaced by a much stronger material.
Disadvantage
Gluing is more expensive due to the higher price of the mortar and the larger number of required facing bricks. Contractors also often charge more for carrying out this kind of work.
Tip
Although the glue mortar is concaved and is hardly visible when applied correctly, it is recommended to adapt the colour to the facing brick. Applying a light grey glue mortar to a dark facade is not a good idea.
3.TRADITIONAL MASONRY WITH ZERO®
ZERO®, an invention of Vandersanden Group, combines modern architecture without joints with the traditional masonry.
Customers and architects often abandon their initial idea of masonry construction without joints because of the higher price or the difficulty to find a contractor who glues for a reasonable price. ZERO® is an ingenious solution due to its simplicity In principle it is nothing more than a specific size facing brick with which you work in the classic manner with mortar and a trowel. And yet, the result is a facade with thin joints of 3 to 6 mm.
The difference between ZERO® and classic masonry is in the laying of the brick. The brick is no longer pressed vertically, but tilted.

ZERO® has a special opening on the upper side of the brick. As a result the mortar bed is lower. It will sink even deeper when the next course of bricks is laid. On the facing side this creates a thinner joint. In addition, we also paid attention to a good proportion between the length and width of the brick so that it is perfect for working with a stretcher bond. This way the work proceeds quickly.
Advantage
For a contractor this way of working is hardly an obstacle. He can work with the material/equipment that is familiar to him.

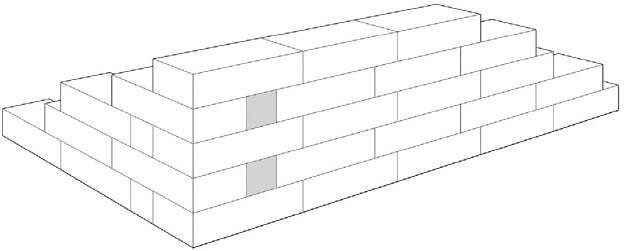
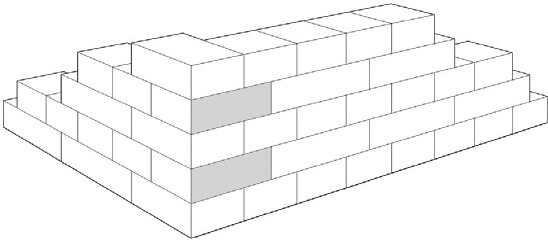
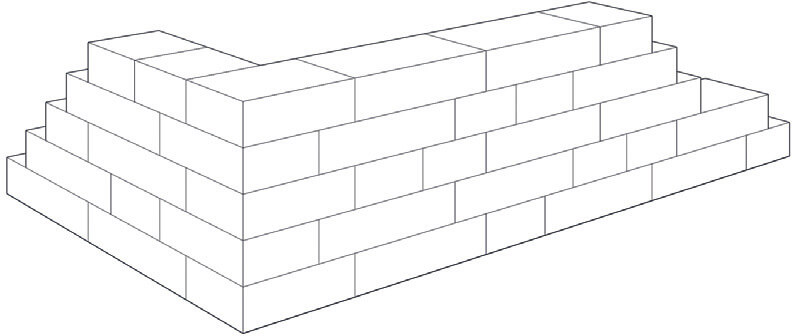
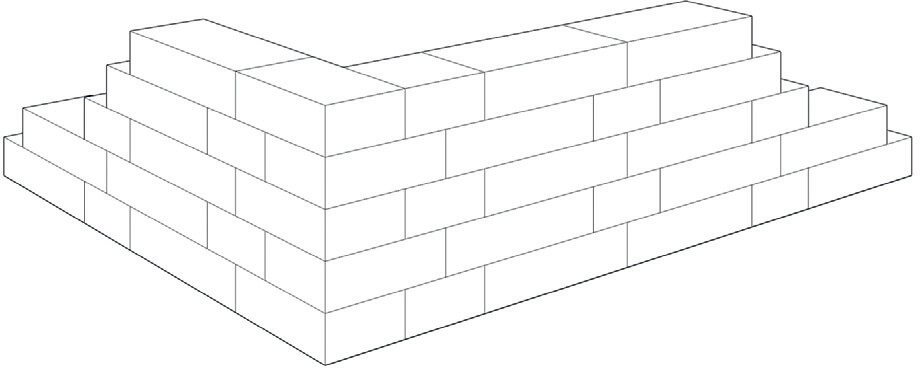
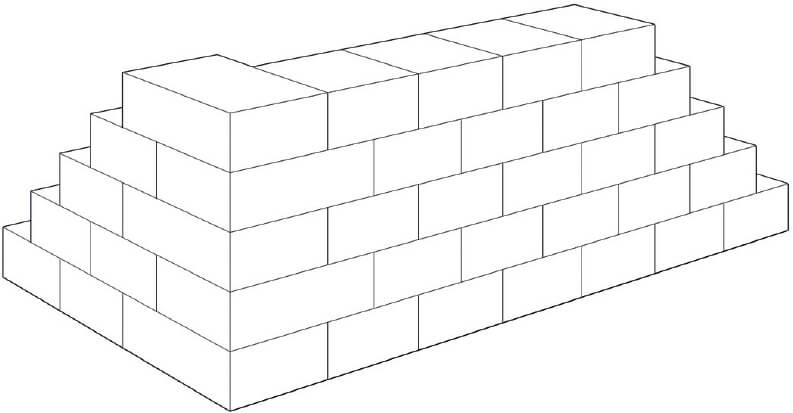
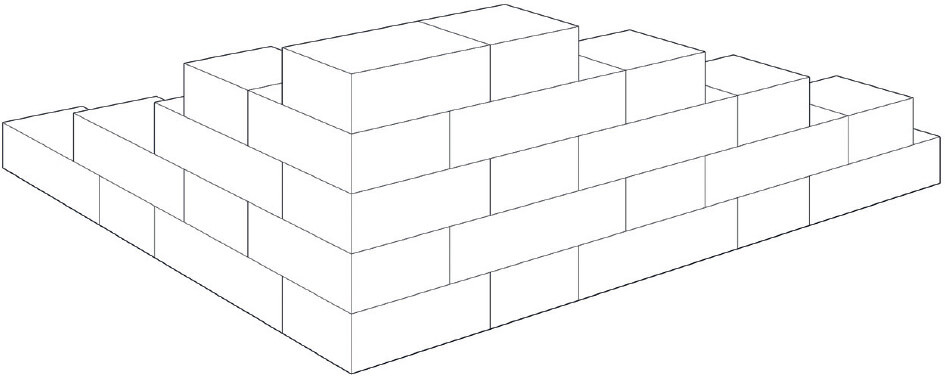
Brickwork Bonds
The way in which a brick is laid
– the brickwork bond –
also strongly influences the appearance
of the facade.
A well thoughtout brickwork bond
gives projects extra style
and character.
Brickwork bonds not only have an aesthetic effect; The choice in brickwork bond can also influence the budget. More complicated bonds, which usually necessitate more grinding work, can substantially raise the price.
Stretcher bond
This is the most common and used brickwork method. The vertical joints are staggered each time by half a brick. There is hardly any loss of material because the bricks do not have to be cut to size.
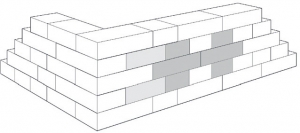
Stack bond (or stacked bond)
This bond visually emphasises the vertical aspect of the masonry. The facing bricks are laid one on top of the other so that not only the horizontal edge joints, but also the vertical head joints are continuous.
This can be done with stretchers as well as with headers. However, the latter will up the price due to all the grinding and cutting work.
As there is no bonding, typically stainless steel ladder reinforcement is built into every third bed-joint.
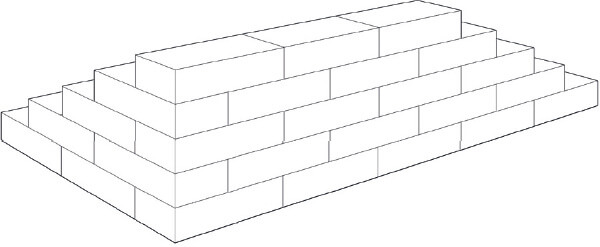
Raking stretcher bond
A variation on the stretcher bond. The vertical joints are staggered each time by a quarter or three-quarters of the brick’s length. Aesthetically this gives a descending movement to the bond. This can even be carried out to the left and to the right. At a certain height you change the direction in order to break the long bonds of slanting bricks. This way you create a zigzag effect.

By laying a quarter-closer, the direction of the ‘toothing’ changes, descending to the left or to the right. In this example, a quarter-closer has been used every two courses, resulting in ‘racking’ (a standing tooth).
English bond
This bond maintains a pattern of headers and stretchers. A course of stretchers alternates with a course of headers.
The stretcher course is each time started with a king-closer (three-quarter brick).
English bond is preferred pattern for viaducts, bridges, embankment walls as well as other civil engineering architectures.
Block bond
A combination of the stretcher and stack bond. Two courses are laid in stack bond and the next two courses are laid while staggering by half a brick.

You can be very creative with brickwork bonds. Here the block bond has 4 courses, but it alternates with a horizontal-vertical stack bond.
English cross bond
As the name hints at, crosses are visible in this pattern. They are formed by alternating a course of headers with a course of stretchers, just like in English bond.
There are 2 variations:
English cross bond with king-closer:
A king-closer is laid at the end of the stretcher course. Every 4 courses a header is laid next to the king-closer. This way the bricks are staggered by half a brick.

English cross bond with queen closer:
The king-closer is NOT placed in the stretcher course but in the header course. Furthermore, it is not laid all the way at the end, but next to the last header of the course.
Every 4 courses a header is laid in the stretcher course so that the bricks are staggered by half a brick.

Irregular bond
As the name hints at, there is no pattern in this bond. Various lengths of bricks are used, but never smaller than a quarter brick. There is only one rule: The vertical head joints may not continue into the next brickwork course, but must stagger each time. This brickwork bond is recommended/proper bond when laying or gluing facing bricks that are characterised by a low dimensional stability. When using recycled bricks you sometimes have no other choice.
Monk bond
An elegant and often used bond with a simpler pattern. All the courses consist consecutively of a header and two stretchers. As a result, the headers are aligned every second course, resulting in the formation of a ‘procession’.
Compared to the English bond and the English cross bond, the number of headers is limited and therefore the price is lower.
Monk bond was popular in the region of the Baltic Sea until turn of 13th and 14th centuries, then Flemish bond gradually replaced it.
Header bond
All the courses consist only of headers that are staggered by half a brick. The header bond is sometimes combined with the regular stretcher bond in order to create a curve in the wall in an easier way, for example.
In the past header bond was often used for curved brickwork and buildings of high quality.
Flemish bond
This bond resembles the monk bond. It differs in that all courses consist consecutively of a header and a stretcher. An often used bond that includes a little more cutting work.
This bond is weaker than English bond at one brick thick.
French bond
Every course alternately consists of a stretcher and two headers.


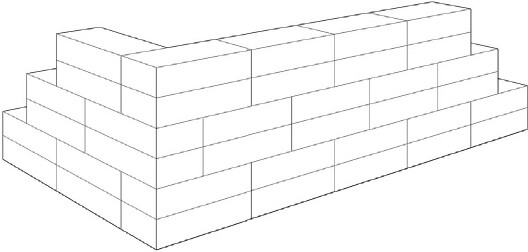
No vertical head joints
By laying the facing bricks against each other the head joints disappear and only the edge joint remains. This emphasises the horizontal play with lines of the masonry even more. It is an elegant way of visually lengthening a building.
Zero - Conventional masonry without visible joints

Thanks to Vandersanden there is finally a perfect way to combine modern architecture with traditionally laid brick. Vandersanden Group has developed Zero®, the patented brick without visible joints that is laid in the standard way with mortatr and trowel.
The Zero® brick have a special recess on the top into which mortar can be applied in the traditional way.Moreover, the ratio between the length and width of the brick is ideal for laying brick in a half-brick bond. This clever design means that Zero® brick can be laid quickly and easily.
With Zero® we get an extremely durable facade with sleek, modern lines that show off the brickwork in its purity. Unlike many other materials, Zero® brick facade is very user-friendly and low-maintenance.

ZERO®, NOTHING BUT BENEFITS
1. The colour of the brick is not influenced by the colour of the joint. As a result it gives you exactly what you want: a pure, sleek, brick facade.
2. You don’t need joints, so there’s no need to erect scaffolding which saves a lot of time and money.
3. The result can be seen immediately.
4. No special tools are necessary. Your joint-free facade can be laid in the traditional way only with the help of a trowel and masonry mortar.
5. The Zero® brick are laid in the usual way: by tilting. This means that no excess mortar ends up on the front, and the brick remain in pristine condition.
6. The narrow, open lap-joints ensure excellent cavity ventilation.
7. Your facade will look perfect for longer: a facing brick stays clean much longer than a joint.

BRICKLAYING WITH ZERO®
Technical tips
1. Calculate the brick size
Take 10 bricks at random from different packs, from the top, the bottom, the side and the middle of the packs. Lay them lengthwise one after another. Measure the length of the line, divide by the total number of bricks and add an average joint thickness, for example 3 or 4 mm. You use the calculated length as a distribution measure for all the facades. Doublecheck the measurement by repeating the calculation with 10 other bricks.
An example:
The total length of a line of 10 Zero® bricks is 2040 mm. The average length of one brick is therefore 204 mm. The coordinating size is then calculated as follows: 204 mm + 3.5 mm (average joint thickness) = 207.5 mm. This size is used to set out the facades.
Tip:
- Create a ruler that is as long as this calculated measure to be used for the entire construction to prevent you from making any errors for your Flemish bond.
- Always take the bricks from the pack diagonally,never horizontally. It is best to mix bricks from at least 4 packs.
Caution!
- The size of Zero® bricks can differ slightly depending on the production location and production batch. The size of each brick can only be defined with the bricks that are supplied to the site.
- If several colours are used in the project,you need to determine the size per brick colour.
- Don’t use an object to determine the joint (such as a piece of the measure or a small plastic plate). Remember you are working with handmade bricks, which may have individual deviations.
- You obviously have to take into account the plan when you lay out the bricks further according to the coordinating size. If you were to continue laying out the bricks with ‘fixed weep hole lengths), the Flemish bond would shift and you would have to do a lot of grinding work afterwards.
- For wall surfaces with a length of less than 5 m, when laying you will not always come out by adapting the head joints within the tolerances. In this case it is necessary to grind bricks

2. Calculate the course size
Take 10 random bricks from several packs. Stack them all on top of each other and divide the total height by the number of bricks. Add the average joint thickness and use this average measurement to determine the course measurement.
An example: the total height of 10 bricks is 510 mm. Divide this height by 10 bricks to obtain the course measurement, in this case 51 mm.
You also need to observe a minimum joint thickness of 3 mm (max. 5 mm). If you want to use a joint thickness of 4 mm, your course measurement will be 55 mm.
Tip:
- Create a ruler that is as long as this calculated measurement to be used for the entire construction to prevent you from making any errors for your Flemish bond.
- Always take the bricks from the pack diagonally, never horizontally. It is best to mix bricks from at least 4 packs.
Caution!
The size of Zero® bricks can differ slightly depending on the production location and production batch.
If several colours are used in the project, you need to determine the average size for all colours

3. Choose the right mortar
The quality of joint-free brickwork with Zero® facing bricks depends not only on the quality of the brick, but also on the quality of the mortar. A ZERO stone comes with an oval hole at the centre in the lowered mortar bed. When laying, the mortar “creeps” along both the bottom and the top in this opening. The result: the laying surface is increased, which significantly raises the bonding value. This means that a normal-quality mortar is more than adequate for ZERO brickwork.
Tip:
Zero® bricks must be wind-dry when used. When using at high temperatures, you have to slightly moisten the brickwork after use.

4. Determine the mortar colour
If Zero® bricks are laid correctly, much less mortar is visible than in traditional brickwork, but an unsuitable mortar colour can still be undesirable. We advise to opt for a darker mortar to reinforce the shadow effect of the joint. For a more unicoloured effect, you can choose a matching coloured mortar, e.g. red mortar for a red facing brick. Many mortar manufacturers offer a wide range of coloured mortars. For more information, please contact your construction retailer.


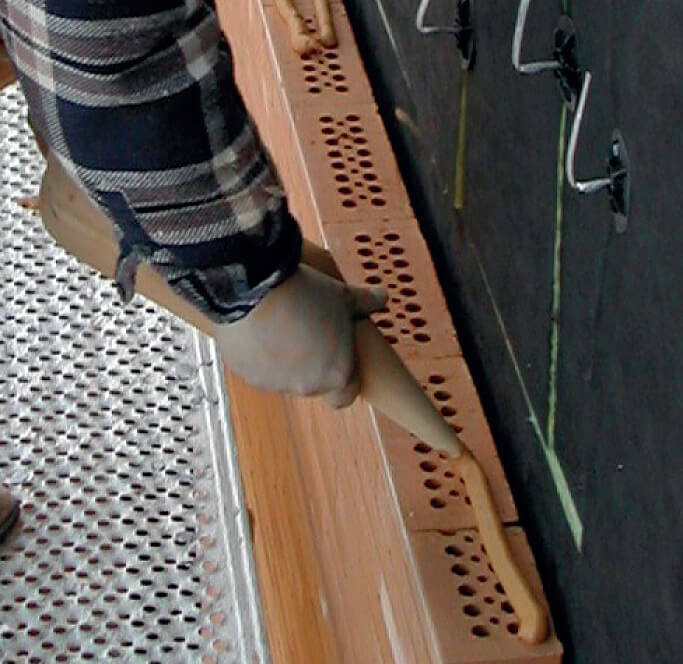
5. Tilt the bricks
Apply mortar to the mortar bed, the Zero® brick’s special recess. Make certain that the mortar does not touch the front edges. You position the next course of bricks with a turning tilting movement from the front towards the back in order to distribute the mortar over the mortar bed. This pushes excess mortar backwards where you can scrape it off with a trowel. Thanks to this tilting technique you avoid mortar remains at the front of the brick.

6. Damp proofing below ground level
Lay the first layer of bricks upside down. Maintain a broad joint, so that you can compensate for irregularities in the subsoil. Place a moisture-proof foil between the layer of bricks beneath ground level and the layer above it. In this way you prevent rising moisture. In order to obtain a thin joint here, we recommend adhesively bonding this foil with polymers. Place water-resistant insulation under the moisture-proof foil, for example XPS.
Tip:
For walls ending in inner corners, we recommend to put the closers in the inner corner. In this way you don’t disturb the beautiful brickwork look in the outside corner.

7. Provide a vertical dam
In order to prevent air and water infiltration along the sills and windows, you place a waterproof foil with possibly a draught strip between the window frame and the facade brickwork.and possibly a draft strip against the window.

8. Use closers
Even when a building is laid out well, the length of certain walls wil not correspond perfectly with the determined brick size, for example between 2 wall openings. In order to achieve a seamless façade the brickwork can only be realized with bricks which are longer or equal than the header. We recommend the use of closers as the perfect solution. The implementation can differ depending the situation. Experience has shown that this causes the least disruption to the layout.


9. You can place joists and lintels in 2 different ways
The joist and lintel remain visible.
The brick is placed on top of the joist or lintel with the mortar bed (special recess) facing up. When you position the support, you have to take into account the course measurement. The thickness of the joist or lintel should be removed from the brickwork right underneath it. The window casement therefore also has to be lowered. The upright sides of the brick can also be removed.
Caution!
- The bricks laying on the joist/lintel have to be applied cold on to the steel. This prevents any damage due to the steel expanding.
- Also take into account a free space of at least 10 mm, as the lintel may bend.

The joist and lintel are not visible.
The Zero® bricks are placed upside down on the support (with the mortar bed or recess facing downwards). In order to ensure that the course measurement is not interrupted, the support has to be placed in a position that is high enough.
The support’s thickness determines the height at which it has to be positioned above the support.
The course above the reversed Zero® course has to be glued.

10. You can create expansion joints in 2 ways
Straight expansion: this should have a 5 mm opening or a 10 mm opening with foam cords and sealer. Stepped expansion: this should be open with a built-in guide allowing the walls to move freely independently from each other. This guide can be foil or a thin foam strip of 7 to 8 cm wide and 3 mm thick. This expansion has to observe the physics of the construction against a longitudinal wall and can therefore not be created on the corners of a building.


11. Garden or freestanding walls
By ‘tilting’ or ‘clicking’ the bricks, freestanding elements such as a garden wall are constructed with an open cavity. It is important that such a construction has a fixed element in order to avoid a see-through effect through the butts.

12. Flat roofs
We recommend that you lay the uppermost layer of ZERO bricks with the mortar bed downwards. In this way you get a flat substrate that significantly facilitates the installation of the roof edge.

FAQ
Do I have to use a specific masonry mortar with Zero®?
Yes, you do. You need a mortar that guarantees good adhesion. For this reason we recommend that you use ready-mixed mortars specially designed for this type of brickwork. Various mortar manufacturers make them. The contractor can check the adhesion on site with a cross test or a 1-minute test.
Can rain get through the open lap-joints?
No. This also applies to glued facades. Various tests have shown that 4 mm open joints do not let rain through. Furthermore, facing brick absorb rain water because of their porous structure. They will also dry out quicker thanks to the open structure of Zero® walls. A joint-free facade is thus every bit as rainproof as a facade with joints.
Do I need more brick per m2?
Yes, you do. In joint-free brickwork the facing brick plays a more prominent role. The joints are narrower and the length of the brick is adapted accordingly. You will need about 90 brick per m2.
With Zero® is there a greater risk that insects, such as bees or wasps, can get through the open lap-joints and nest in the cavity?
No. In fact, the opposite is true. The open lap-joints are only 4 mm wide, which is too narrow for them to penetrate. Furthermore, bees and wasps don’t like open and ventilated environments.

![]()
SIGNA - Millions of possibilities

What is Signa?
Signa consists of a weather-resistant Rockpanel® and a composition of Vandersanden brick slips which is adhesively bonded.
The panels are produced for you ready-to-use, which can give your projects a unique and striking look.
Signa as an innovative facade cladding system gives a whole new dimension to brick as a facade cladding. It offers many possibilities for exclusive projects, high-rise buildings or other architectural projects. You can play with relief, colour, format, brickwork bond and create your own design with expressive facades that fully highlight the character of brick.
Thanks to Signa, you can get either robust or elegantly irregular full-relief facade, entirely according to your individual design with Vertical, horizontal or diagonal patterns.
Technical Characteristics
Rockpanel®
The supporting panel on which the brick slips are adhesively bonded in the factory is a form-retaining and weather-resistant Rockpanel® board composed of compressed and solidified basalt rock fibres. The format is variable and can be optimally harmonised with your project.

Vandersanden brick slips
For the brick slips you can select any brick from the Vandersanden line. This is regardless of format, colour or direction of saw cut – even diagonally cut is possible. You also possess an un-precedented degree of freedom with regard to brickwork bonds, combinations of types of brick, repetition of patterns or gradual colour and/or format variation over the whole of the facade. You choose the composition and the variations in the relief yourself.

Millions of possibilities
On the basis of four variables Signa gives endless patterns.
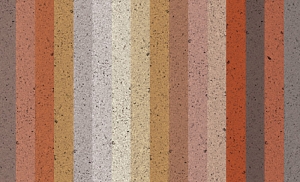
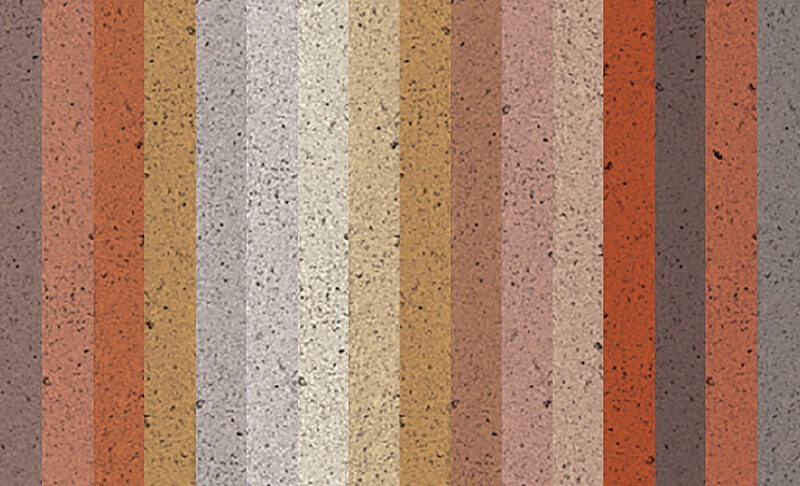
Colour
You choose and combine from the full Vandersanden line. We offer you a range of more than one hundred colours, expanded by the four surface textures: hand-moulded, formback, water-struck and aged.

Relief
We can cut slips of various thicknesses for the stretcher, the header and the sole. You choose a straight or diagonal cutting line. Moreover, several parts can be used from one and the same brick. You do not have to limit yourself to just a single cutting line. By combining several cutting lines you create an intense composition with a varying relief that is full of character.

Format
As a basis you can use the stretcher, header and slip of five Vandersanden brick formats:
M50 ± 190 x 90 x 50 mm
WF ± 210 x 100 x 50 mm
M65 ± 190 x 90 x 65 mm
DF ± 210 x 100 x 65 mm
NF ± 240 x 115 x 70 mm

Bond
You can apply the familiar brickwork bonds such as half-brick, English bond or irregular bond. Combinations of these brickwork bonds are achievable. Horizontal, vertical and even diagonal brick sections are amongst the possibilities. This is feasible because Signa is not laid but adhesively bonded, thus offering greater freedom.

From design to implementation
1. You work out a unique patternof brick slips. 2. We discuss with you the possibilities of the designed composition and work out a three-dimensional visualisation of the panel. 3. The mounting method is determined. 4. The facade plan is fully elaborated in detail. 5. After approval, the Signa panels go into production. 6. The Vandersanden Group transports the panels safely and punctually to the work site. 7. A specialised installation company fastens the Signa panels at the building site.
Mounting
The ready-to-use Signa panel can be mounted in several ways.
Screw or glue Signa onto an aluminium or wood framework. This framework can be mounted on a range of different substrates.
Aluminium support structure
The posts of the aluminium support structure are mounted against the bearing wall. In new construction this the inner cavity wall, in renovations the existing facade. After installation of, preferably black coated, insulation between the vertical aluminium T-profiles, horizontal C-profiles are mounted. Specialised installation companies then fasten the Signa panels with aluminium plate hooks to the support structure.
Wooden support structure
The water-resistant spar work of a wooden support structure is built up in the same way as an aluminium support structure. The vertical posts are anchored to the rough structure with distance bolts so that insulation can be applied. Vertical laths at the level of the framework keep black vapour-permeable foil in its place. With both installation systems, the individual mounting of fitting pieces ensures that the separate Signa panels harmoniously merge into a single whole.


![]()
The Gdansk Shakespeare Theatre / Renato Rizzi
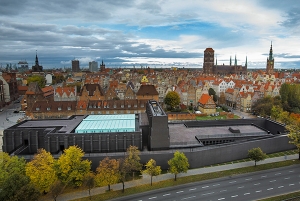
The Gdansk Shakespeare Theatre / Renato Rizzi